|
Regular Great Dane ear cleaning prevents infections
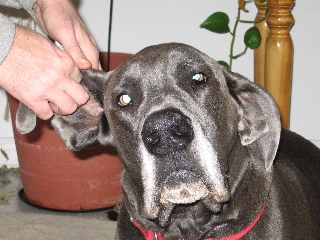
Great Dane ear cleaning can be a challenge because the canals are so deep. You have to get right into the ear canal, but of course have to take great care in not damaging the ear drum. And everything has to be dry at the end because moisture in the canal makes it a perfect place for yeast or bacteria to grow. We use an ear cleaning solution, lots of cotton swabs and tissue for this operation. Step One: Wash the Ear
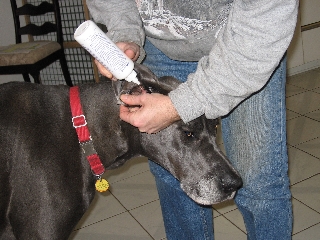
Once the solution is in the cavity, gently message the area just below the canal opening (which you are still holding to ensure the solution doesn’t just spill out). The idea is to loosen up the wax, dirt, debris or whatever is in there as much as possible. Messaging the canal will cause the motion necessary for the solution to get at everything. The next step is to release the Dane’s head and allow him to clear the solution out. And he will! Standby for vigorous head shaking! You may want to put a towel up beside his head to prevent the splatter getting everywhere (we don’t do this in the livingroom!). Step Two: Remove the debris Now that the debris has been loosened up, it’s time to get it out. 
We use cotton swabs. Start around the ear canal opening and work your way in. It is important not just to wipe up any dirt that has become loose, but also all the cleaning solution. The ear canal needs to be dry at the end of this process. There are many ridges and bumps at the entrance to the canal – make sure you clean and dry under all of them. The canal itself is a bit trickier, but can be done properly if gentle. One of the reasons we use cotton swabs (instead of cotton balls or q tips) is that we can’t cause damage by sticking anything into the eardrum. Using a finger, take a swab and wipe the ear canal area you can see. A Great Dane’s canal has a sharp bend in it and you need to get the swab into the bottom of the “L” shape. Be gentle, but make sure you cover this bottom area. It doesn’t take long to develop a feel for it, but it does take some care – allowing the swab to be stuck in the canal is certainly not an acceptable outcome. Step Three: Dry the ear canal Once the swabs are coming out clean and dry, there is only one more check to be done. Because Dane ears do get so dirty, there is no avoiding putting moisture into the canal with the cleaning solution. By using cotton swabs and nothing smaller than a finger (so you don’t cause any damage to the ear), you won’t be able to get right at the ear drum area to dry everything up. The only way to get into this final part is to take a tissue or Kleenex, twist a corner and push that into the canal as far as you can. This will come up against the ear drum, but won’t cause any damage. It should pick up any excess moisture, leaving the canal dry. This step feels awkward and you may think it is not doing any good, but it is. If you consistently leave moisture behind, you are just inviting a yeast infection. And of course listen to your Dane, If she yelps, you are doing something wrong. Ours doesn’t particularly like this process but he lets us do it and he knows at the end of it there’s a treat waiting for him! And it is important. If we miss a couple of weeks the chances are good that the scratching will start and it soon becomes very obvious that one of his ears is causing considerable discomfort. Great Dane ear grooming can be difficult if you don't approach it properly. But doing it regulary and gently will ensure ear infections don't become a problem.
Back to top of Great Dane ear cleaning
|
 The first step is to fill the ear cavity with cleaning solution. We find the best way is to lift the Danes jaw until the head is pointing up and with one hand pull out the skin just under the ear canal entrance, creating a hole in which to pour the solution. Be careful not to squeeze air into the canal (which is not pleasant for the dog), but gently squirt the solution in until the whole ear cavity is full. No half measures! This is messy, but it is the most effective way to get results.